Birthsign Menu Recreation
This is a simple recreation of the vanilla birthsign menu. This shows off 3 features: lists/scrolling, clicking buttons, and manipulating menu/game states in real time.
The important thing to ask when creating a new menu is “what do we need?” For this menu, we will need:
List of birthsigns
Image of current birthsign
Set player’s birthsign
Title for current birthsign
This is not a lot of aspects, which makes for a pretty simple menu to implement. For simplicity, I axed the description of the current birthsign. Since all aspects of interactivity are based around the list of the birthsign, it should be the first thing we need to build.
Menu Root
Before we can display a list, we need to have the structure of a menu to put it into. Generally, this is referred to as the “menu root”, the primary ancestor for all parts of this specific menu.
Since we are only creating a single generic menu, we only need a single XML document. We will create
the file Data\Menus\Generic\Kat\BirthsignRemake.xml.
The first thing we need, thus, is the menu tile.
Rect Tile
As this is a simple menu, we only need one main rect tile. However, there’s a bit of a design
dilemma here. We want a menu that looks good, but how do we actually achieve that? We can use
prefab documents to achieve this. If you look inside the
Data\Menus\Prefabs folder inside Oblivion - Misc.bsa, we can see a collection of XML
documents with specific functions. If you peruse through these documents, you can see how they’re
generally built (using user traits). UI mods also provide their own prefab documents as needed. For
now, we just want a basic background, so for that we will used generic_background.xml. Lets take
a look at this prefab real quick.
generic_background.xml
When working with prefabs, we want to work with what the prefab is designed to be worked with. That means using user traits and underscore-prefixed traits only. Let’s see what this prefab has:
<!--
*** IMPORTANT ***
To set the width and height, use user0 and user1.  This is because the border
is built around the passed-in values.
-->
<user0> 800 </user0> <!-- menu width -->
<user1> 500 </user1> <!-- menu height -->

<width>
       <copy src="me()" trait="_rounded_width" />
</width>
<height>
       <copy src="me()" trait="_rounded_height" />
</height>

<_tile_size> 1 </_tile_size>                 <!-- repeating length of border elements -->
<_border_thickness> 44 </_border_thickness>  <!-- thickness of border elements -->

<_rounded_width>
       <copy src="me()" trait="user0" />
       <div src="me()" trait="_tile_size" />
       <ceil> 0 </ceil>
       <mul src="me()" trait="_tile_size" />
</_rounded_width>
<_rounded_height>
       <copy src="me()" trait="user1" />
       <div src="me()" trait="_tile_size" />
       <ceil> 0 </ceil>
       <mul src="me()" trait="_tile_size" />
</_rounded_height>
The traits with float values are the only ones we want to touch. These are designed to be touched
by the author of this prefab. The 4 traits in this case are: user0, user1, _tile_size,
and _border_thickness. user0 is the width of the menu, while user1 will be the height.
The other 2 traits are pretty self-explanatory.
Implementing the Prefab
<rect name="bmr_background">
    <include src="generic_background.xml" />
    <visible> &true; </visible>
    <id> 100 </id>
    <depth> 0 </depth>
    <locus> &true; </locus>
    <target> &false; </target>
            <user0> 800 </user0>
            <user1> 500 </user1>
    <x>
        <copy src="screen()" trait="width" />
        <sub src="me()" trait="width" />
        <div> 2 </div>
    </x>
    <y>
        <copy src="screen()" trait="height" />
        <sub src="me()" trait="height" />
        <div> 2 </div>
    </y>
</rect>
For the x and the y positions, we can use selectors to grab screen data
and the current width and height of the menu to automatically center the menu. Selectors require a
source trait to copy from. Since x and y position are the leftmost and topmost pixels of the
tiles, we need this position to be centerable. Simply dividing the screen dimensions in half will
not do, as that would imply that x and y positions are based on the center of the tile. To
get around this, we subtract out the dimensions of the tile. This essentially shifts the “center” of
the tile up and to the left, allowing it to appear centered in the screen.
Since we don’t have any other tile or functionality, we can just have leave this as is. We can even render this tile. So lets fire up Construction Set Extender. For our own simplicity, we will simply launch a menu with a button, so let us create a cell with a button it:
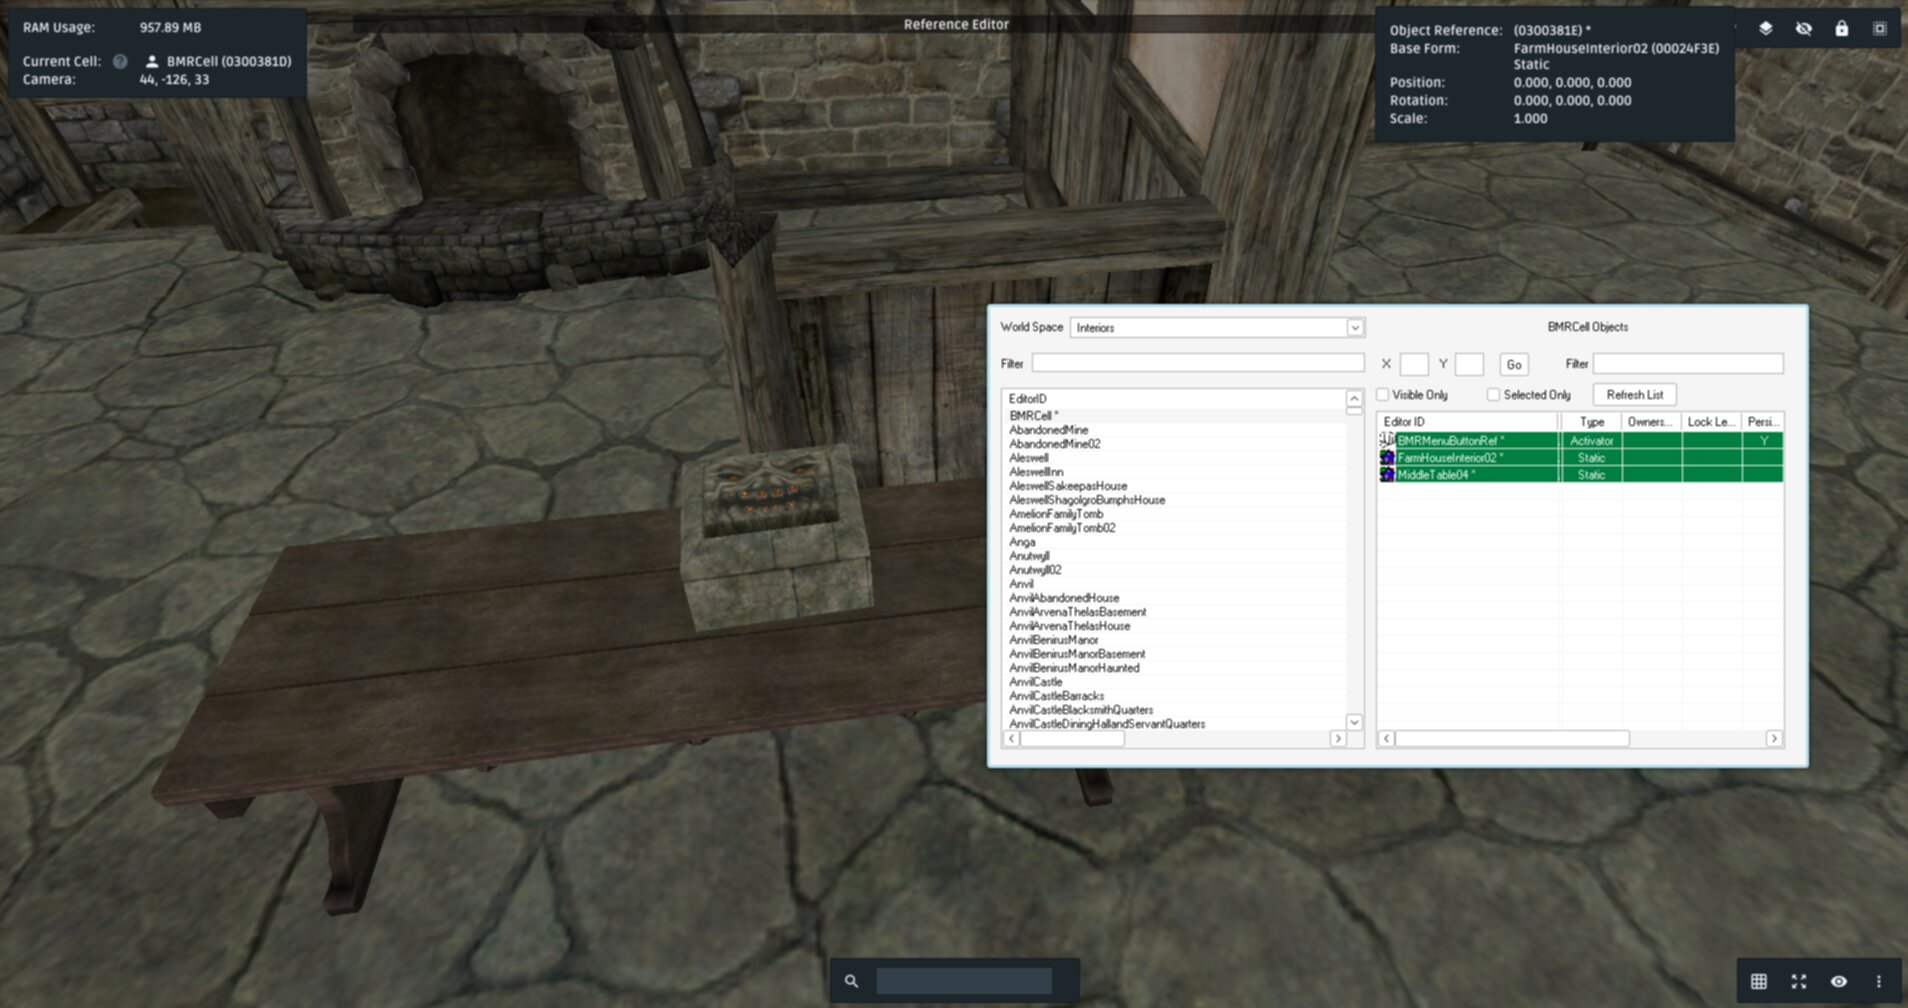
As this is a test, we don’t need much complication here. An activator is a quick way to test our menu out.
It is useful to handle large functionality in object scripts with a user-defined function, so for the button’s script we simply call a main menu function:
scn BMRActivator
Begin OnActivate
        Call BMRFunction
End
scn BMRFunction
Begin Function{}
        ;; Create menu using GMF
        Call GMFShowMenu "kat\birthsignremake.xml" 0
End
Saving these scripts, and setting our button’s object script to BMRActivator, when we coc
BMRCell in game, we should have a functioning menu:
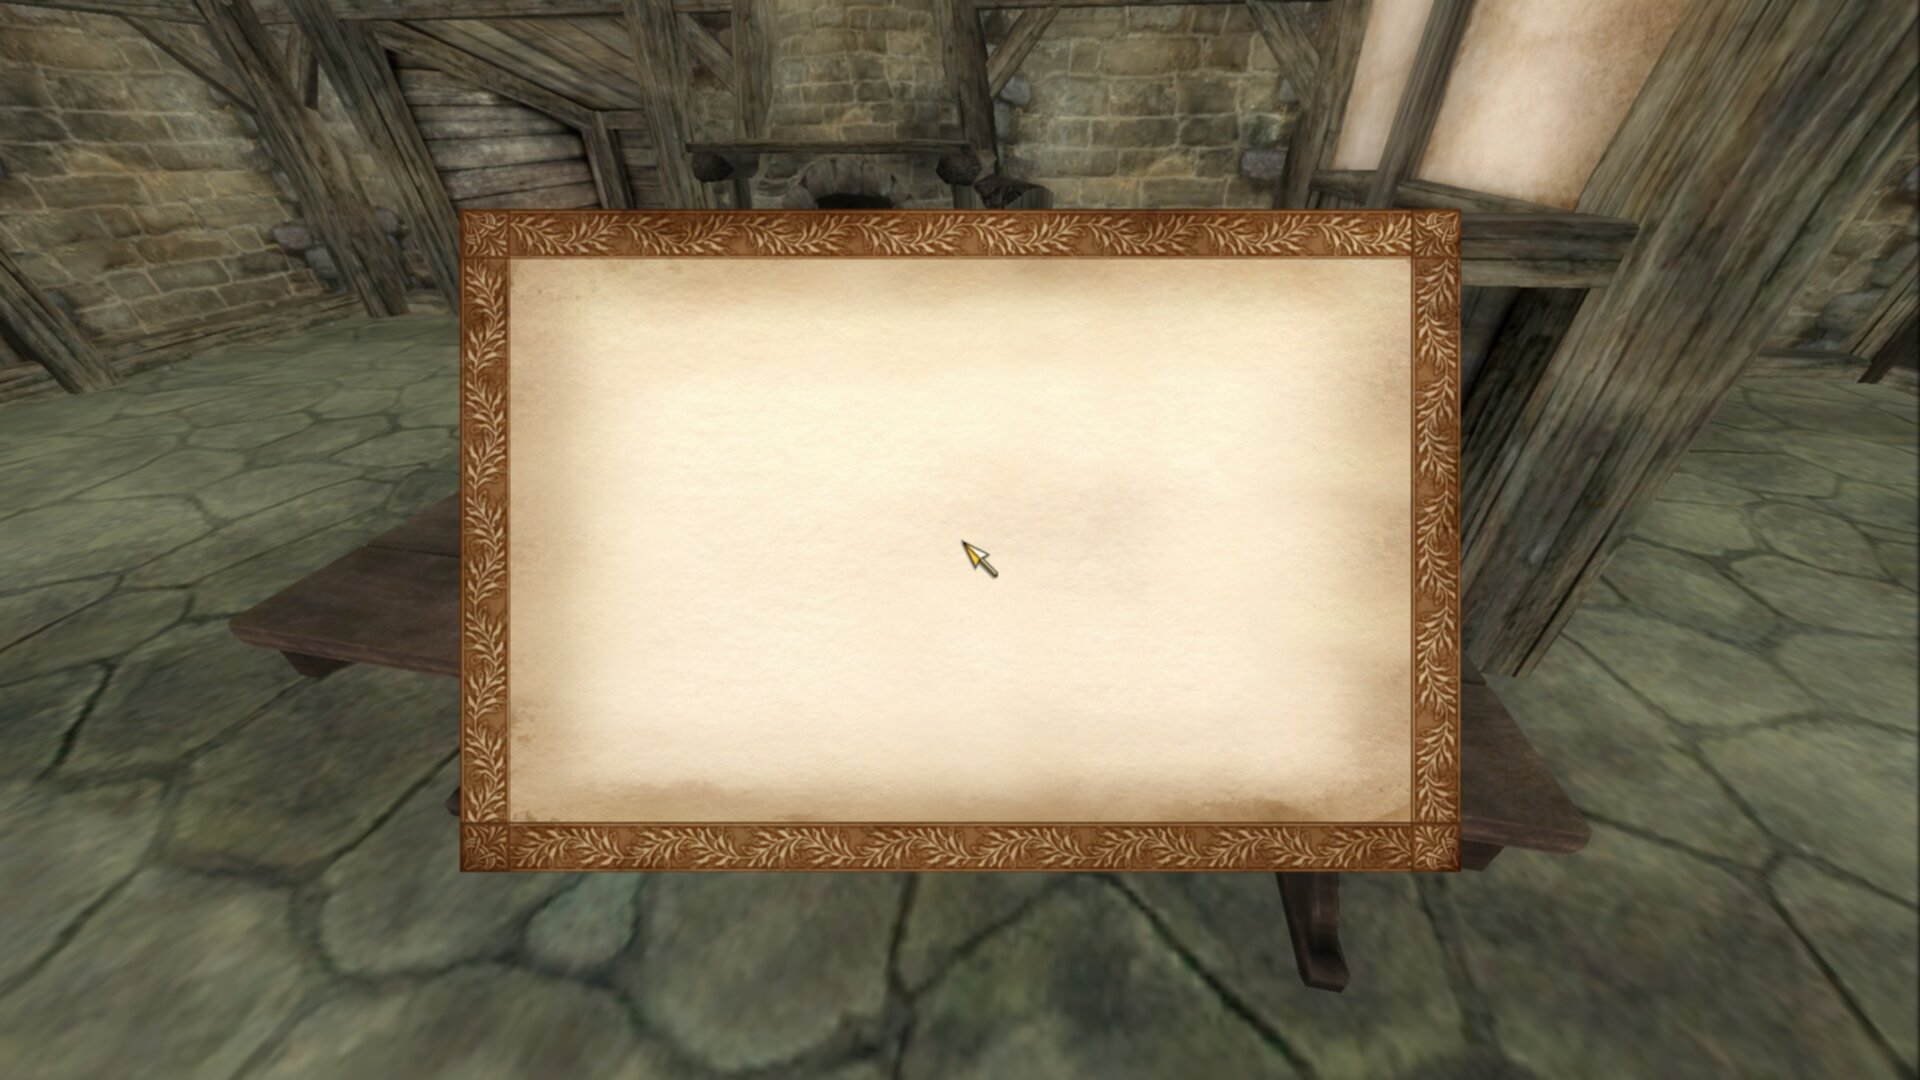
Notice that despite the 1920x1080 image, the 800x500 menu does not scale accurately. This is a side effect of UI rendering based on its internal parameters.
Congrats! You have created a generic menu. Now we need to fill out all the details.
Displaying Current Birthsign
Looking back to our list of features, lets work out what depends on what.
List of birthsigns
Image of current birthsign
Set player’s birthsign
Title for current birthsign
The list of birthsigns is pretty independent. The image and title of the current birthsign only depends upon the player’s birthsign. Setting the player’s birthsign depends upon the list. Since the image and title is dependent upon the player’s current status, we can start there.
We would need 2 tiles for the title and image:
<!-- birthsign.xml -->
<menu name="BirthsignRemake">
        <class> &GenericMenu; </class>
        <stackingtype> &no_click_past;
        <locus> &true; </locus>
        <explorefade> 0.25 </explorefade>

        <rect name="bmr_background">
                <include src="generic_background.xml" />
                <visible> &true; </visible>
                <id> 100 </id>
                <depth> 0 </depth>
                <locus> &true; </locus>
                <target> &true; </target>
                <user0> 800 </user0>
                <user1> 500 </user1>
                <user0>
                        <copy> 0 </copy>
                        <add src="bmr_background_image" trait="width" />
                        <add> 10 </add>
                </user0>
                <user1>
                        <copy> 0 </copy>
                        <add src="bmr_background_image" trait="height" />
                        <add> 10 </add>
                </user1>
                <x>
                        <copy src="screen()" trait="width" />
                        <sub src="me()" trait="width" />
                        <div> 2 </div>
                </x>
                <y>
                        <copy src="screen()" trait="height" />
                        <sub src="me()" trait="height" />
                        <div> 2 </div>
                </y>

                <image name="bmr_background_image">
                        <target> &false; </target>
                        <locus> &true; </locus>
                        <filename> Menus\Birthsign\Birthsign_The Warrior.dds </filename>
                        <id> 110 </id>
                        <depth> 3 </depth>
                        <zoom> &scale; </zoom>
                        <height> 256 </height>
                        <width> 256 </width>
                        <x> 0 </x>
                        <y> 60 </y>
                </image>

                <text name="bmr_class_name">
                        <id> 111 </id>
                        <string> Current class: The Warrior </string>
                        <depth> 3 </depth>
                        <font> 3 </font>
                        <red> 0 </red>
                        <green> 0 </green>
                        <blue> 0 </blue>
                        <alpha> 200 </alpha>
                        <visible> &true; </visible>
                        <locus> &false; </locus>
                </text>

        </rect>
</menu>
There’s, a lot, going on here.
Image Tile
The image tile bmr_background_image is where we are going to render out the current class image.
As this is an image tile, we need to be very specific as to how this gets render.
First, we use a fallback image for the filename trait, in this case just the Warrior birthsign
image.
Second, since we are using images with all the same sizes, the zoom value becomes less of a concern.
For birthsigns, all the texture sizes are 512x512, which is clearly too big for our desired menu
(less than 800x500). However, a feature of the zoom trait is that it can take the
&scale; entity in which the zoom value will be automatically adjusted to fit the confines of the
height and width of the tile.
Third, we need to actually define the confines of the texture. As 512x512 was simply too big,
256x256 will suffice.
Text Tile
This tile is a bit simpler, as it is just a text tile. Since we can’t set the width and
height traits, we will use fonts for the specific sizes we want. We can see the system possible
fonts within Oblivion.ini. For example with a vanilla game:
[Fonts]
SFontFile_1=Data\Fonts\Kingthings_Regular.fnt
SFontFile_2=Data\Fonts\DarN_Kingthings_Petrock_14.fnt
SFontFile_3=Data\Fonts\DarN_Kingthings_Petrock_16.fnt
SFontFile_4=Data\Fonts\DarN_Oblivion_28.fnt
SFontFile_5=Data\Fonts\Handwritten.fnt
While there are no hardset rules for font naming schemes, generally un-numbered fonts are between 12 and 14 point (which again gets scaled from menu coordinates to your screen’s coordinates). Generally the first font file is used for most UI elements, but there are no hardset rules. We will use font 3 here.
Since width and height traits are read only, we just have to assume that the text can fit
inside the width we wanted for this tile. Therefore, including a default string value is still
useful here.
Color should also be imported from other values, as Oblivion does not actually use black text.
Functioning menu
Scripting Current Birthsign
Of course, we do actually want the menu to do something, so lets add in the scripting.
The beauty of basic tiles like text and images means we don’t need to do much to change these values:
scn BMRFunction
ref rBirthsign
string_var sBirthsign
Begin Function{}
        Let rBirthsign := GetPlayerBirthsign
        Let sBirthsign := GetName rBirthsign
        ;; Create menu using GMF
        Call GMFShowMenu "kat\birthsignremake.xml" 0
        Call GMFSetTileStringValue "bmr_background\bmr_class_name" "string" ("Current class: " + sBirthsign)
        Call GMFSetTileStringValue "bmr_background\bmr_background_image" "filename" ("Menus\Birthsign\Birthsign_" + sBirthsign + ".dds")

        ;; PLEASE DESTRUCT UNNEEDED STRINGS
        sv_Destruct sBirthsign
End
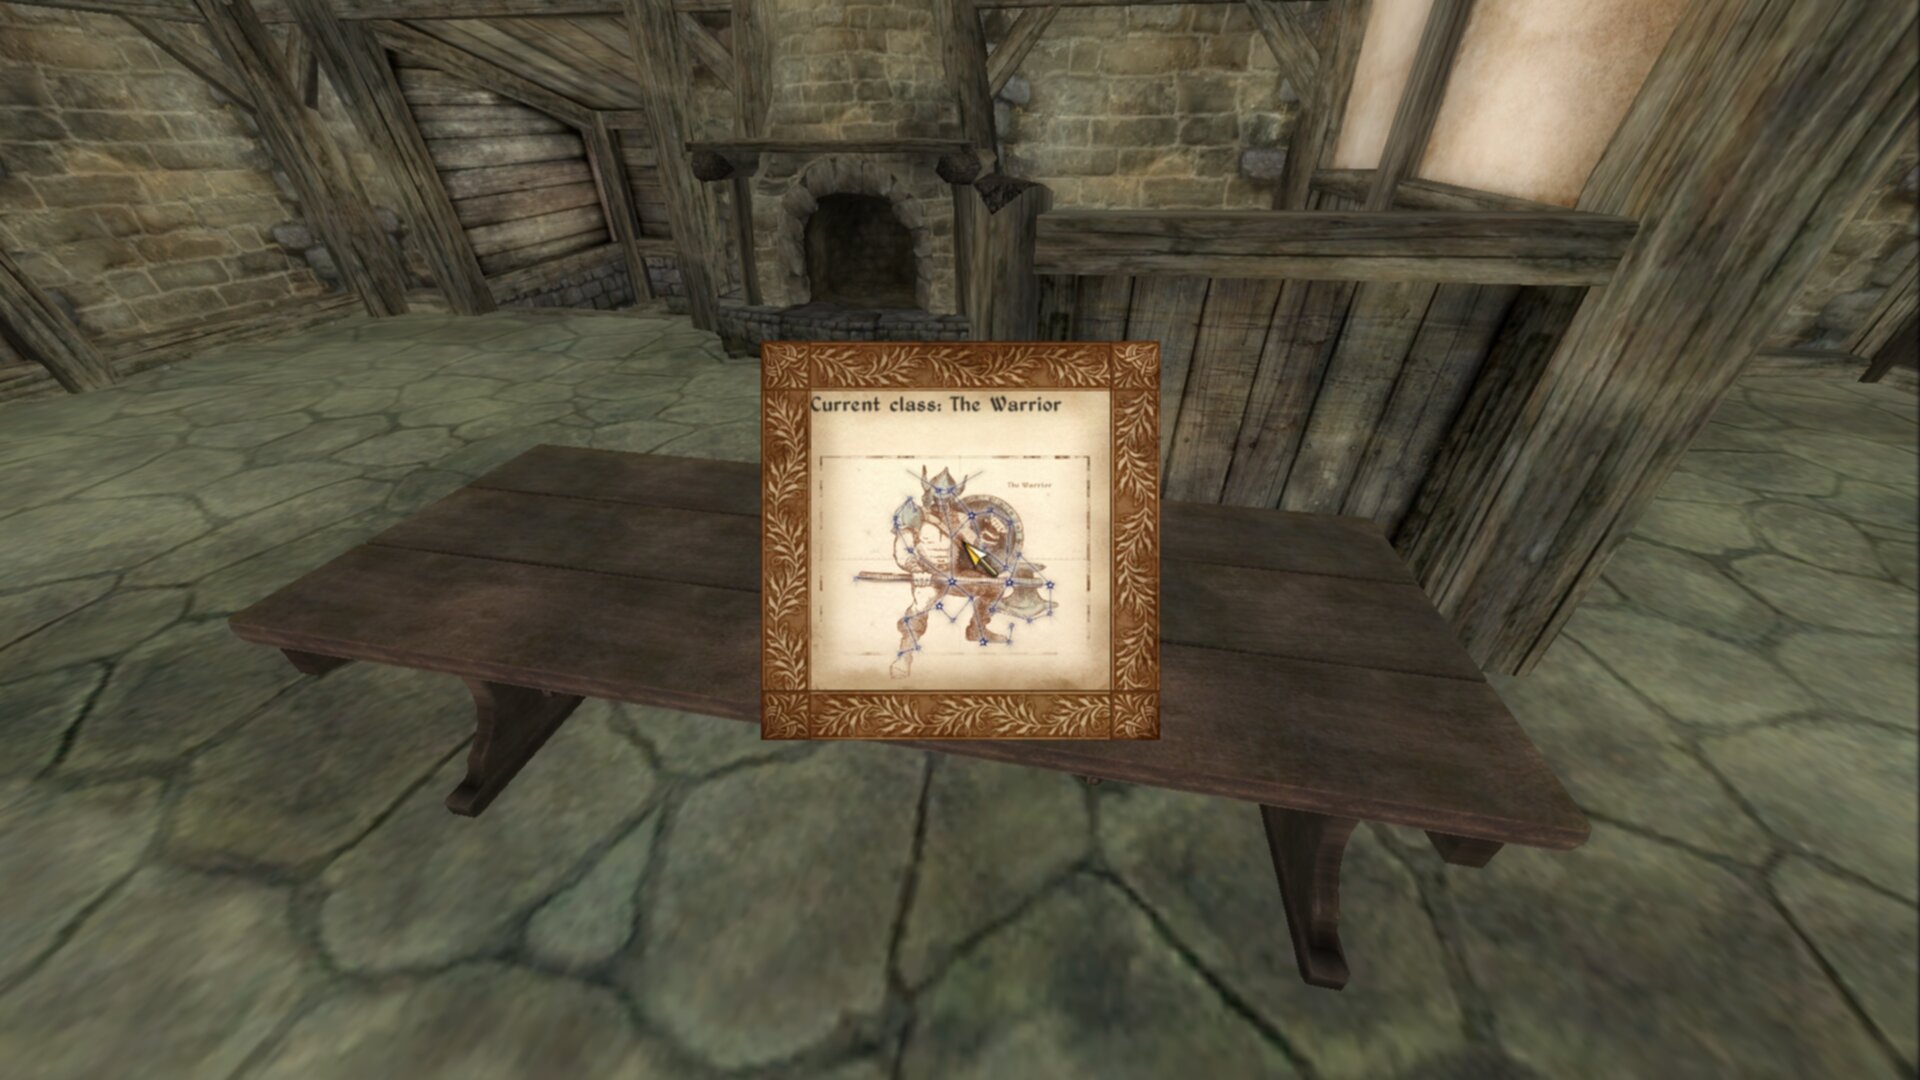
We only need to touch the appropriate string values of the two tiles. That’s it. With a setter function this is pretty straightforward too.
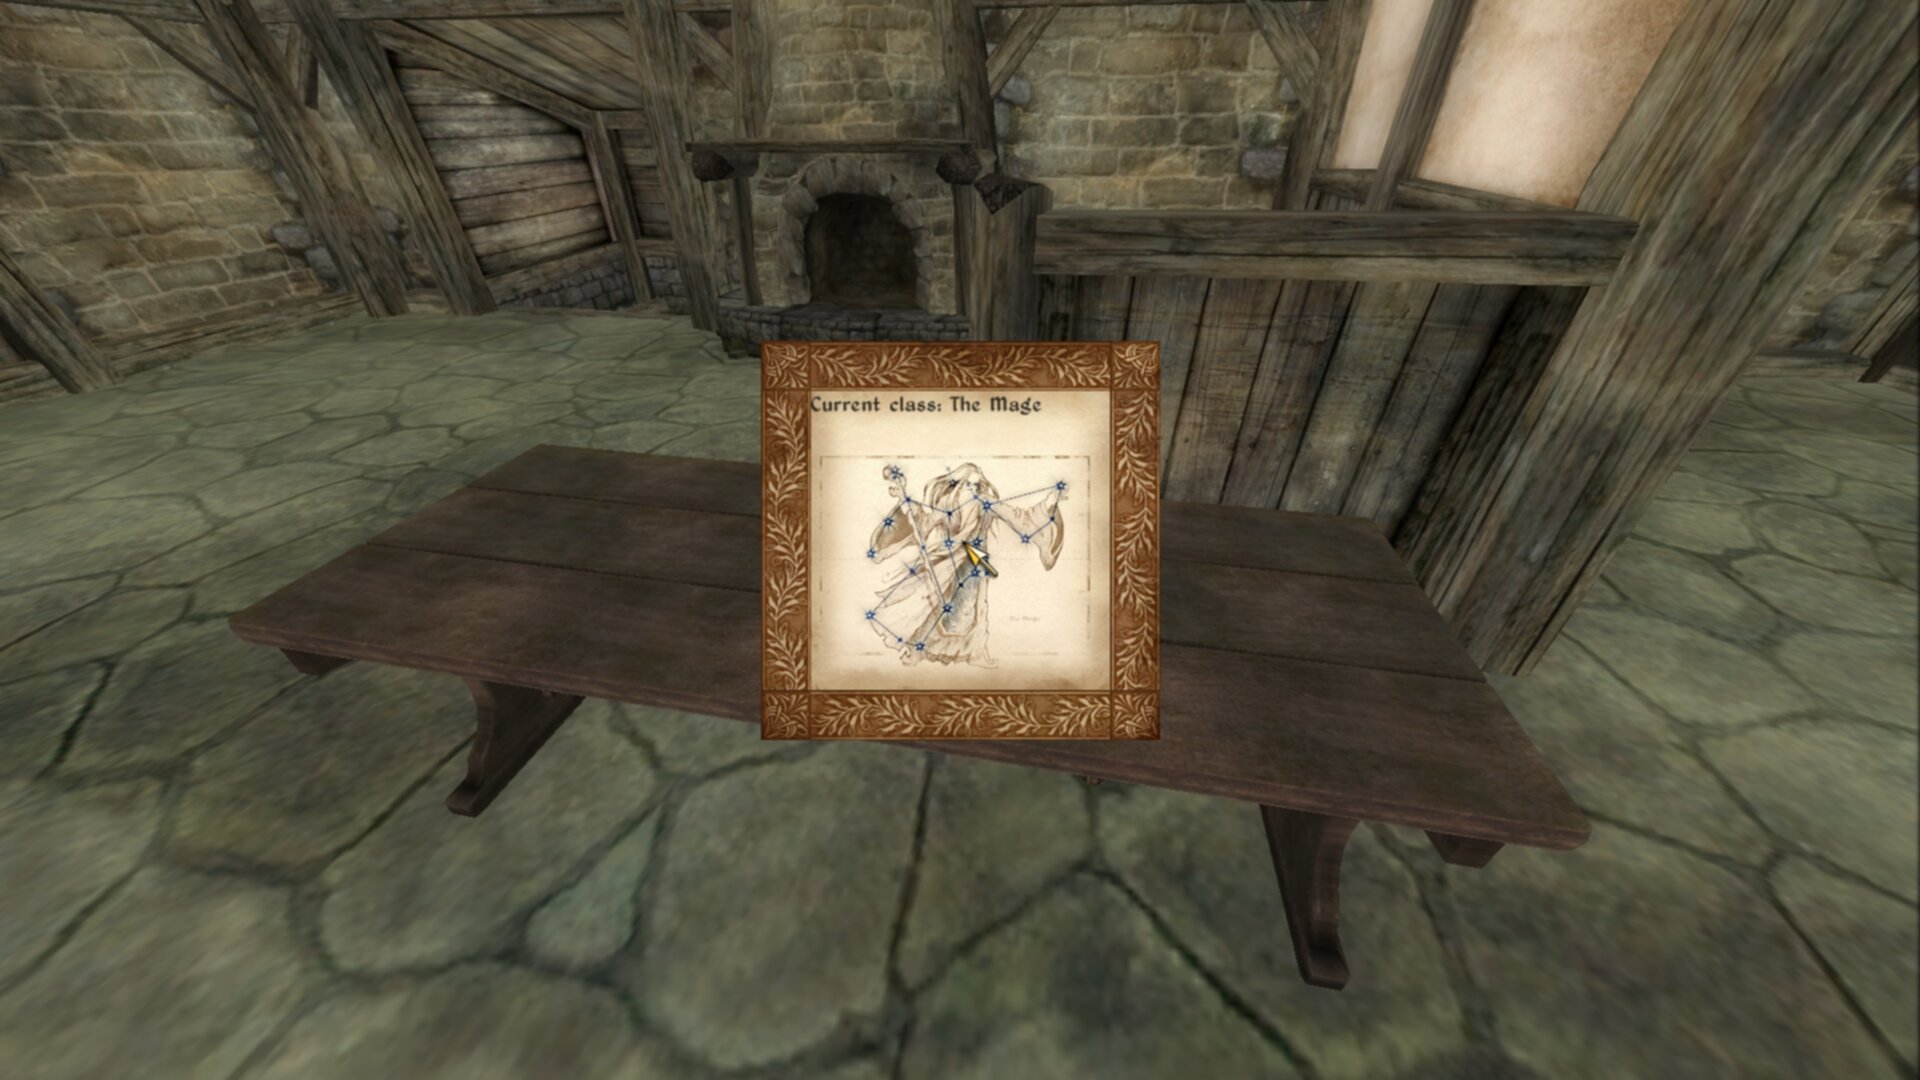
Current birthsign is now shown.
Creating A List
Historically, adding a list to a menu has been the most complicated and unknown part of Oblivion
menus. GenericMenuFramework fortunately makes this simpler. What we need is a rect that will
hold our list.
<menu name="BirthsignRemake">
<class> &GenericMenu; </class>
<stackingtype> &no_click_past; </stackingtype>
<locus> &true; </locus>
<explorefade> 0.25 </explorefade>
<rect name="bmr_background">
<include src="generic_background.xml" />
<visible> &true; </visible>
<id> 100 </id>
<depth> 0 </depth>
<locus> &true; </locus>
<target> &true; </target>
<user0>
<copy> 0 </copy>
<add src="bmr_background_image" trait="width" />
<add src="bmr_info_box" trait="width" />
<add> 10 </add>
</user0>
<user1>
<copy> 0 </copy>
<add src="bmr_background_image" trait="height" />
<add> 10 </add>
</user1>
<x>
<copy src="screen()" trait="width" />
<sub src="me()" trait="width" />
<div> 2 </div>
</x>
<y>
<copy src="screen()" trait="height" />
<sub src="me()" trait="height" />
<div> 2 </div>
</y>
<image name="bmr_background_image">
<target> &true; </target>
<locus> &true; </locus>
<filename> Menus\Birthsign\Birthsign_The Warrior.dds </filename>
<id> 110 </id>
<depth> 3 </depth>
<zoom> &scale; </zoom>
<height> 256 </height>
<width> 256 </width>
<x> 0 </x>
<y> 60 </y>
</image>
<text name="bmr_class_name">
<id> 111 </id>
<string> Current class: The Warrior </string>
<depth> 3 </depth>
<font> 3 </font>
<red> 0 </red>
<green> 0 </green>
<blue> 0 </blue>
<alpha> 200 </alpha>
<visible> &true; </visible>
<locus> &false; </locus>
</text>
<rect name="bmr_info_box" >
<target> &true; </target>
<height> <copy src="bmr_background" trait="height" /> </height>
<width> <copy src="bmr_background_image" trait="width" /> </width>
<x> <copy src="bmr_background_image" trait="width" /> </x>
<y> 0 </y>
<text name="bmr_title" >
<id> 121 </id>
<visible> &true; </visible>
<string> Choose your birthsign </string>
<depth> 3 </depth>
<font> 3 </font>
<red> 0 </red>
<green> 0 </green>
<blue> 0 </blue>
<alpha> 200 </alpha>
<visible> &true; </visible>
<locus> &true; </locus>
<target> &false; </target>
<wrapwidth> <copy src="parent()" trait="width" /> </wrapwidth>
<x>
<copy src="parent()" trait="x" />
<add> 5 </add>
</x>
<y> 0 </y>
</text>
<image name="bmr_scroll_bar">
<include src="vertical_scroll.xml"/>
<target> &true; </target>
<depth> 4 </depth>
<id> 122 </id>
<x>
<copy src="bmr_info_box" trait="x" />
<add src="bmr_info_box" trait="width" />
<sub> 10 </sub>
</x>
<y> 36 </y>
<height>
<copy src="bmr_info_box" trait="height" />
<sub> 61 </sub>
</height>
<user1> 0 </user1>
<user2>
<copy src="bmr_info_list_box" trait="child_count" />
<sub src="me()" trait="user8" /> <!-- remove the viewable items -->
<add> 2 </add>
</user2>
<user3> 1 </user3>
<user4> 6 </user4>
<user5> 0 </user5>
<user6> 33 </user6>
<user8> 8 </user8>
</image>
<rect name="bmr_info_list_box">
<id> 123 </id>
<depth> 5 </depth>
<alpha> 0 </alpha>
<locus> &false; </locus>
<x> <copy src="bmr_background_image" trait="width" /> </x>
<height>
240
</height>
<y>
<copy> 0 </copy>
<add>
<copy src="bmr_title" trait="height" />
</add>
</y>
<target> &false; </target>
<xdefault> &true; </xdefault>
<xlist> &xlist; </xlist>
<xscroll> <ref src="bmr_scroll_bar" trait="user5" /> </xscroll>
</rect>
</rect>
</rect>
<template name="bmr_list_template">
<rect name="bmr_list_item">
<depth> 6 </depth>
<id> 200 </id>
<target> &true; </target>
<repeatvertical> &true; </repeatvertical>
<alpha> 0 </alpha>
<width> 600 </width>
<height> 36 </height>
<clips> &true; </clips>
<locus> &true; </locus>
<x> <copy src="bmr_background_image" trait="width" /> </x>
<y>
<copy> 36 </copy>
<mul>
<copy src="me()" trait="listindex" />
<sub src="bmr_scroll_bar" trait="user7" />
</mul>
<add> 36 </add>
</y>
<listclip>
<copy src="me()" trait="listindex"/>
<gte>
<copy src="bmr_scroll_bar" trait="user7"/>
<add src="bmr_scroll_bar" trait="user8"/>
<sub> 2 </sub>
</gte>
<or>
<copy src="me()" trait="listindex"/>
<lt src="bmr_scroll_bar" trait="user7"/>
</or>
</listclip>
<clicksound> 1 </clicksound>
<listindex> 0 </listindex>
<user1> </user1>
<xdefault> &false; </xdefault>
<xlist> &xitem; </xlist>
<xup> &prev; </xup>
<xdown> &next; </xdown>
<xscroll>
<copy src="me()" trait="listindex" />
<sub>
<copy src="bmr_scroll_bar" trait="user8"/>
<div> 2 </div>
<ceil> 0 </ceil>
</sub>
<add> 1 </add>
</xscroll>
<text name="bmr_list_name" >
<depth> 8 </depth>
<string> <copy src="parent()" trait="user1" /> </string>
<justify> &left; </justify>
<font> 3 </font>
<red> 0 </red>
<green> 0 </green>
<blue> 0 </blue>
<alpha> 200 </alpha>
<wrapwidth> 475 </wrapwidth>
<wraplines> 1 </wraplines>
<clips> &true; </clips>
<x> 5 </x>
<y>
<copy> 16 </copy>
<sub>
<copy src="me()" trait="height" />
<div> 2 </div>
</sub>
</y>
</text>
<rect name="bmr_list_focus">
<include src="darn\focus_box.xml"/>
<depth> 7 </depth>
<visible>
<copy src="parent()" trait="mouseover" />
<eq> 1 </eq>
</visible>
<y> 5 </y>
<width>
<copy src="bmr_list_name" trait="width" />
<add> 15 </add>
</width>
<height> 22 </height>
</rect>
</rect>
</template>
</menu>
There’s a lot to handle here. A list isn’t just a single component, it is pretty encompassing. The
actual list rect is “bmr_info_list_box”, but this list itself contained in another rect
“bmr_info_box”. This is done to be able to move around the entire list “object”, scroll bar, title,
and any other UI elements, all at the same time. As well, it is much simpler to only manipulate a
dedicated list element.
The template is the UI element for every list item. GenericMenuFramework will insert these one at a time, allowing for side-effects to happen when each list item is inserted.
bmr_info_box
<rect name="bmr_info_box" >
       <target> &true; </target>
       <height> <copy src="bmr_background" trait="height" /> </height>
       <width> <copy src="bmr_background_image" trait="width" /> </width>
       <x> <copy src="bmr_background_image" trait="width" /> </x>
       <y> 0 </y>
</rect>
This rect contains all of our list related UI elements. Since we are creating a one feature
menu, let’s just make the list the same size as bmr_background_image. The Y-position doesn’t
need to move, but the X-position should simply be the width of bmr_background_image to offset
this rect.
Inside are 3 tiles:
bmr_title
<text name="bmr_title" >
       <id> 121 </id>
       <visible> &true; </visible>
       <string> Choose your birthsign </string>
       <depth> 3 </depth>
       <font> 3 </font>
       <red> 0 </red>
       <green> 0 </green>
       <blue> 0 </blue>
       <alpha> 200 </alpha>
       <visible> &true; </visible>
       <locus> &true; </locus>
       <target> &false; </target>
       <wrapwidth> <copy src="parent()" trait="width" /> </wrapwidth>
       <x>
                <copy src="parent()" trait="x" />
                <add> 5 </add>
       </x>
       <y> 0 </y>
</text>
We should notify the user as to what this list does. This is a basic text tile that does this.
bmr_scroll_bar
<image name="bmr_scroll_bar">
       <include src="vertical_scroll.xml"/>
       <target> &true; </target>
       <depth> 4 </depth>
       <id> 122 </id>
       <x>
              <copy src="bmr_info_box" trait="x" />
              <add src="bmr_info_box" trait="width" />
              <sub> 10 </sub>
       </x>
       <y> 36 </y>
       <height>
              <copy src="bmr_info_box" trait="height" />
              <sub> 61 </sub>
       </height>
       <user1> 0 </user1>
       <user2>
              <copy src="bmr_info_list_box" trait="child_count" />
              <sub src="me()" trait="user8" /> <!-- remove the viewable items -->
              <add> 2 </add>
       </user2>
       <user3> 1 </user3>
       <user4> 6 </user4>
       <user5> 0 </user5>
       <user6> 33 </user6>
       <user8> 8 </user8>
</image>
The scroll bar is fairly complex, requiring a lot to it. The traits here, while sometimes clear, are particular:
- x:
The right edge of the top arrow
- y:
The position where the top arrow begins
- height:
Distance between the two arrows, not to the tips
- user1:
Minimum scrollable value, which should be 0 here
- user2:
Maximum scrollable value, controls scroll-off amount
- user3:
Amount to scroll when arrow is clicked
- user4:
Amount to scroll when bar is clicked
- user5:
Starting value of scroll bar. Leave at 0
- user6:
ID for scroll bar marker
- user7:
Do not set, reads scroll position
- user8:
Amount of visible items
However, this is all this tile needs to get scrolling working in this document.
bmr_info_list_box
<rect name="bmr_info_list_box">
       <id> 123 </id>
       <depth> 5 </depth>
       <alpha> 0 </alpha>
       <locus> &false; </locus>
       <x> <copy src="bmr_background_image" trait="width" /> </x>
       <height> 240 </height>
       <y>
              <copy> 0 </copy>
              <add> <copy src="bmr_title" trait="height" /> </add>
       </y>
       <target> &false; </target>
       <xdefault> &true; </xdefault>
       <xlist> &xlist; </xlist>
       <xscroll> <ref src="bmr_scroll_bar" trait="user5" /> </xscroll>
</rect>
This rect is where we will place our list. The position is mostly the parent rect, but
shifted down by the height of bmr_title.
We need the following traits however:
- target:
Set to
&false;, this isn’t being targeted- xdefault:
Set to
&true;- xlist:
Set to
&xlist;, this tells the engine that this tile contains a list- xscroll:
Set to the
user5of your scroll bar, in this case we are setting tobmr_scroll_bar. This tells the engine what scroll bar this list is attached to.
bmr_list_template
<template name="bmr_list_template">
</template>
This is a template. All templates must be the last elements in the XML document. Templates are used to inject into tiles during run-time. In this case, this template is used for list elements. The template has no traits, it only contains other valid non-template tiles.
bmr_list_item
<rect name="bmr_list_item">
       <depth> 6 </depth>
       <id> 200 </id>
       <target> &true; </target>
       <repeatvertical> &true; </repeatvertical>
       <alpha> 0 </alpha>
       <width> 600 </width>
       <height> 36 </height>
       <clips> &true; </clips>
       <locus> &true; </locus>
       <x> <copy src="bmr_background_image" trait="width" /> </x>
       <y>
              <copy> 36 </copy>
              <mul>
                     <copy src="me()" trait="listindex" />
                     <sub src="bmr_scroll_bar" trait="user7" />
              </mul>
              <add> 36 </add>
       </y>
       <listclip>
              <copy src="me()" trait="listindex"/>
              <gte>
                     <copy src="bmr_scroll_bar" trait="user7"/>
                     <add src="bmr_scroll_bar" trait="user8"/>
                     <sub> 2 </sub>
              </gte>
              <or>
                     <copy src="me()" trait="listindex"/>
                     <lt src="bmr_scroll_bar" trait="user7"/>
              </or>
       </listclip>
       <clicksound> 1 </clicksound>
       <listindex> 0 </listindex>
       <user1> </user1>
       <xdefault> &false; </xdefault>
       <xlist> &xitem; </xlist>
       <xup> &prev; </xup>
       <xdown> &next; </xdown>

       <xscroll>
              <copy src="me()" trait="listindex" />
              <sub>
                     <copy src="bmr_scroll_bar" trait="user8"/>
                     <div> 2 </div>
                     <ceil> 0 </ceil>
              </sub>
              <add> 1 </add>
       </xscroll>
</rect>
This is the primary rect for each list item. It needs some specific traits beyond
appearance/functionality to work as a list item:
- id:
Needs an ID. You do not need to worry about unique IDs for each list item, but an ID is needed.
- target:
Set to
&true;, needed to enable scrolling and clicking.- repeatvertical:
Set to
&true;, needed for lists.- clips:
Set to
&true;, needed to hide value items outside of scroll range.- listclip:
This sets the amount of values that are removed from view. What is needed is for the current listindex to be between the current scroll value and the maximum possible value or below the scroll value. The settings here should work for most cases.
- listindex:
Set to 0, the index for the list item.
- xdefault:
Set to
&false;.- xlist:
Set to
&xitem;, this tells the engine that this tile is an item for a list.- xup:
Set to
&prev;to go to the previous list item.- xdown:
Set to
&next;to go to the next list item.- xscroll:
This controls how far the list item moves when scrolling. The idea is that this should scroll no more than the possible viewable value. The settings here should work for most cases.
Inside are 2 more tiles:
bmr_list_name
<text name="bmr_list_name" >
       <depth> 8 </depth>
       <string> <copy src="parent()" trait="user1" /> </string>
       <justify> &left; </justify>
       <font> 3 </font>
       <red> 0 </red>
       <green> 0 </green>
       <blue> 0 </blue>
       <alpha> 200 </alpha>
       <wrapwidth> 475 </wrapwidth>
       <wraplines> 1 </wraplines>
       <clips> &true; </clips>
       <x> 5 </x>
       <y>
              <copy> 16 </copy>
              <sub>
                     <copy src="me()" trait="height" />
                     <div> 2 </div>
              </sub>
       </y>
</text>
This block is just the text for the list. For convenience, we set the string trait to the
user1 trait of its parent tile for ease of use. There is nothing special about this tile
otherwise.
bmr_list_focus
<rect name="bmr_list_focus">
       <include src="darn\focus_box.xml"/>
       <depth> 7 </depth>
       <visible>
              <copy src="parent()" trait="mouseover" />
              <eq> 1 </eq>
       </visible>
       <y> 5 </y>
       <width>
              <copy src="bmr_list_name" trait="width" />
              <add> 15 </add>
       </width>
       <height> 22 </height>
</rect>
This rect provides a focus box for the list items when there’s a mouseover event for it. We use
a prefab for this, which does most of the work. The main thing here is that the visible trait
needs to compare to 1 to determine if it should be visible or not.
Scripting the List
Now that we have the basics of the menu, we need to hook up all the scripting. Fortunately this is pretty simple overall.
For the main function script, we don’t need to add much:
scn BMRFunction
ref rBirthsign
string_var sBirthsign
array_var aBirthsigns
ref rFunction
Begin Function{}
        ;; Set up birthsign information
        Let rBirthsign := GetPlayerBirthsign
        Let sBirthsign := GetName rBirthsign
        let aBirthsigns := ar_Construct array
        ar_Append aBirthsigns BirthSignApprentice
        ar_Append aBirthsigns BirthSignAtronach
        ar_Append aBirthsigns BirthSignLord
        ar_Append aBirthsigns BirthSignLover
        ar_Append aBirthsigns BirthSignMage
        ar_Append aBirthsigns BirthSignRitual
        ar_Append aBirthsigns BirthSignSerpent
        ar_Append aBirthsigns BirthSignShadow
        ar_Append aBirthsigns BirthSignSteed
        ar_Append aBirthsigns BirthSignThief
        ar_Append aBirthsigns BirthSignTower
        ar_Append aBirthsigns BirthSignWarrior

        ;; Create menu using GMF
        Call GMFShowMenu "kat\birthsignremake.xml" 400
        Call GMFSetTileStringValue "bmr_background\bmr_class_name" "string" ("Current class: " + sBirthsign)
        Call GMFSetTileStringValue "bmr_background\bmr_background_image" "filename" ("Menus\Birthsign\Birthsign_" + sBirthsign + ".dds")

        ;; Populate List
        Let rFunction := BMRSetListText
        Call GMFInsertArrayList "bmr_background\bmr_info_box\bmr_info_list_box" "bmr_list_template" aBirthsigns rFunction
End
We only add 1 extra function call from GenericMenuFramework, which is the list function, but we also
need to pass a function along with it. The function GMFInsertArrayList needs to pass the tile we
want to have the list, the template, the 0-indexed array, and an optional side-effect function.
Without this side-effect function, this function will just display garbage but will insert the
amount of items we wanted. We need the side-effect function to at least display text.
scn BMRSetListText
string_var sTile
array_var aList
int iIndex
string_var sText
string_var sTrueTile
ref rTempRef
Begin Function {sTile, aList, iIndex}
        ;; Normalize list index tile name
        Let sTrueTile := sTile + "\" + $iIndex
        Let rTempRef := aList[iIndex]
        ;; Render name of reference
        Let sText := GetName rTempRef
        Call GMFSetTileStringValue sTrueTile "user1" sText
End
Since we just need to add the name of the birthsign to the list item’s text tile, this function is
absurdly simple. We get the current birthsign from the passed array and index, then we set the
user1 of bmr_list_box.
But this is called differently. For other tile manipulations, we normally just pass a variable such
as sTile, but that’s not what’s happening here. Since list items are iterated over, they are
indexed inside the menu that’s rendered. Therefore the first list item is bmr_info_list_box/0.
Notice how we don’t use bmr_list_box here. This is not a bug but intentional behavior. If we
use tile_GetInfo on sTrueTile to count its children then it will return 2, for
bmr_list_name and bmr_list_focus.
We now have a menu with a list populated!
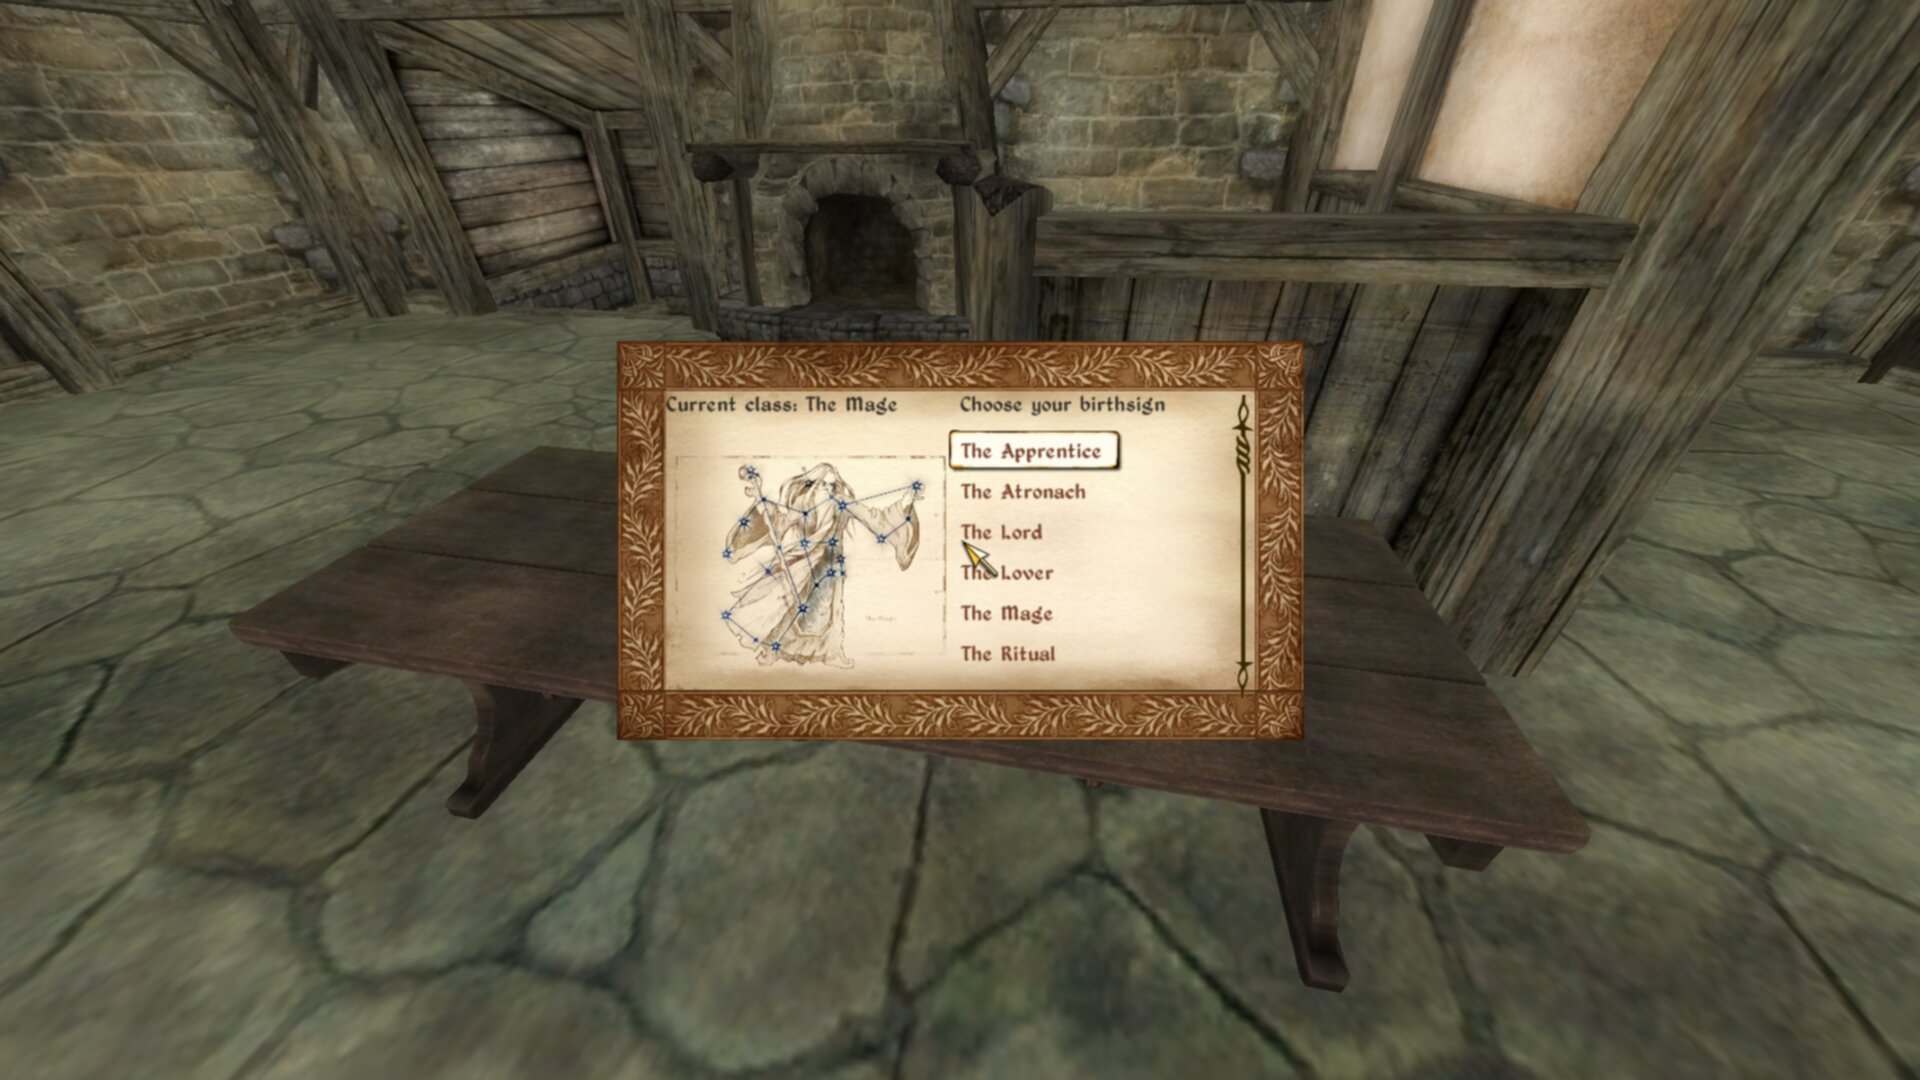
We have a working list.
We can even highlight items with our mouse.
That was a lot of work, but the hardest part was done. Congrats, you’ve uncovered one of the hardest aspects of Oblivion menus. But we are far from done. We need 2 more things, scrolling and making the list update the player’s birthsign. Both are fairly simple so lets just go with that order.
Scrolling A List
Scrolling a list, even more difficult than creating a list historically, is one of the simplest parts of GenericMenuFramework. We need 2 things, a quest script in order to run the needed functions continuously and an array of IDs to target for scrolling. Dragging the scroll marker will also be included here, since it is even simpler to handle.
Quest Script
Quest scripts in Oblivion function as “global” scripts. Since quest objects are always in memory, their associated scripts are always in memory. We can use this for input behavior in this case. As well, since quest scripts are always in memory, we can use them as a namespace for variables. Both will features will be in use here.
scn BMRScript
float fQuestDelayTime
string_var sActiveTile
array_var aIDs
Begin MenuMode 1011
        Let fQuestDelayTime := 0.001
        Let sActiveTile := GetActiveUIComponentName
        if eval sv_Compare "bmr_background" sActiveTile > -2
                ;; DRAGGING -- takes tile to be dragged
                Call GMFOnDragInitFunction "bmr_background\bmr_info_box\bmr_scroll_bar"
                ;; SCROLLING -- takes tile to be dragged, as well as array of IDs
                Call GMFOnScrollVerticalInitFunction "bmr_background\bmr_info_box\bmr_scroll_bar" aIDs
        endif
        ;; WARN: Remember to destruct your strings!!
        sv_Destruct sActiveTile
End
For clarity, the quest script’s ID is going to be BMR.
This is a pretty basic script. Since this plugin is only focused upon creating a new generic menu,
we can use a Begin MenuMode 1011 block, with 1011 being the ID for generic menus. We still want
to check if we are in our menu, but we can do that with a quick check using
GetActiveUIComponentName and seeing if our root menu rect bmr_background is found in the
active tile (active tile meaning the tile the mouse is focused on). sv_Compare returns weird
results, but we are basically asking “is our compared string found anywhere inside the active
tile”.
Inside this check, we have two calls: GMFOnDragInitFunction and
GMFOnScrollVerticalInitFunction. The first function just takes the scroll bar you want to be
able to drag. The second function takes the scroll bar you want to scroll and an array of IDs
that you want the scrolling to be active for. We need to set up this array, and we can do this
within BMRFunction.
Adding ID Array
Since we declared the variable for the array in the quest script, we can easily access them in
BMRFunction.
scn BMRFunction
ref rBirthsign
string_var sBirthsign
array_var aBirthsigns
ref rFunction
Begin Function{}
        ;; Add IDs to passing array
        Let BMR.aIDs := ar_Construct array
        ar_Append BMR.aIDs 33                ;vertical_scroll_marker
        ar_Append BMR.aIDs 100               ;bmr_background
        ar_Append BMR.aIDs 120               ;bmr_info_box
        ar_Append BMR.aIDs 122               ;bmr_scroll_bar
        ar_Append BMR.aIDs 123               ;bmr_info_list_box
        ar_Append BMR.aIDs 200               ;bmr_list_item

        ;; Set up birthsign information
        Let rBirthsign := GetPlayerBirthsign
        Let sBirthsign := GetName rBirthsign
        let aBirthsigns := ar_Construct array
        ar_Append aBirthsigns BirthSignApprentice
        ar_Append aBirthsigns BirthSignAtronach
        ar_Append aBirthsigns BirthSignLord
        ar_Append aBirthsigns BirthSignLover
        ar_Append aBirthsigns BirthSignMage
        ar_Append aBirthsigns BirthSignRitual
        ar_Append aBirthsigns BirthSignSerpent
        ar_Append aBirthsigns BirthSignShadow
        ar_Append aBirthsigns BirthSignSteed
        ar_Append aBirthsigns BirthSignThief
        ar_Append aBirthsigns BirthSignTower
        ar_Append aBirthsigns BirthSignWarrior

        ;; Create menu using GMF
        Call GMFShowMenu "kat\birthsignremake.xml" 400
        Call GMFSetTileStringValue "bmr_background\bmr_class_name" "string" ("Current class: " + sBirthsign)
        Call GMFSetTileStringValue "bmr_background\bmr_background_image" "filename" ("Menus\Birthsign\Birthsign_" + sBirthsign + ".dds")

        ;; Populate List
        Let rFunction := BMRSetListText
        Call GMFInsertArrayList "bmr_background\bmr_info_box\bmr_info_list_box" "bmr_list_template" aBirthsigns rFunction

        ;; WARN: Remember to destruct strings
        sv_Destruct sBirthsign
End
In here, we insert the IDs we want to control to the namespaced aIDs. Each of these IDs are
basically all the IDs we have, but if you want you can control these finer. It is also helpful to
label what each ID is.
Now, since we call ar_Construct each time we call this function, and we call this function with
an activator, BMR.aIDs is always recreated. Just remember this when you’re dealing with arrays.
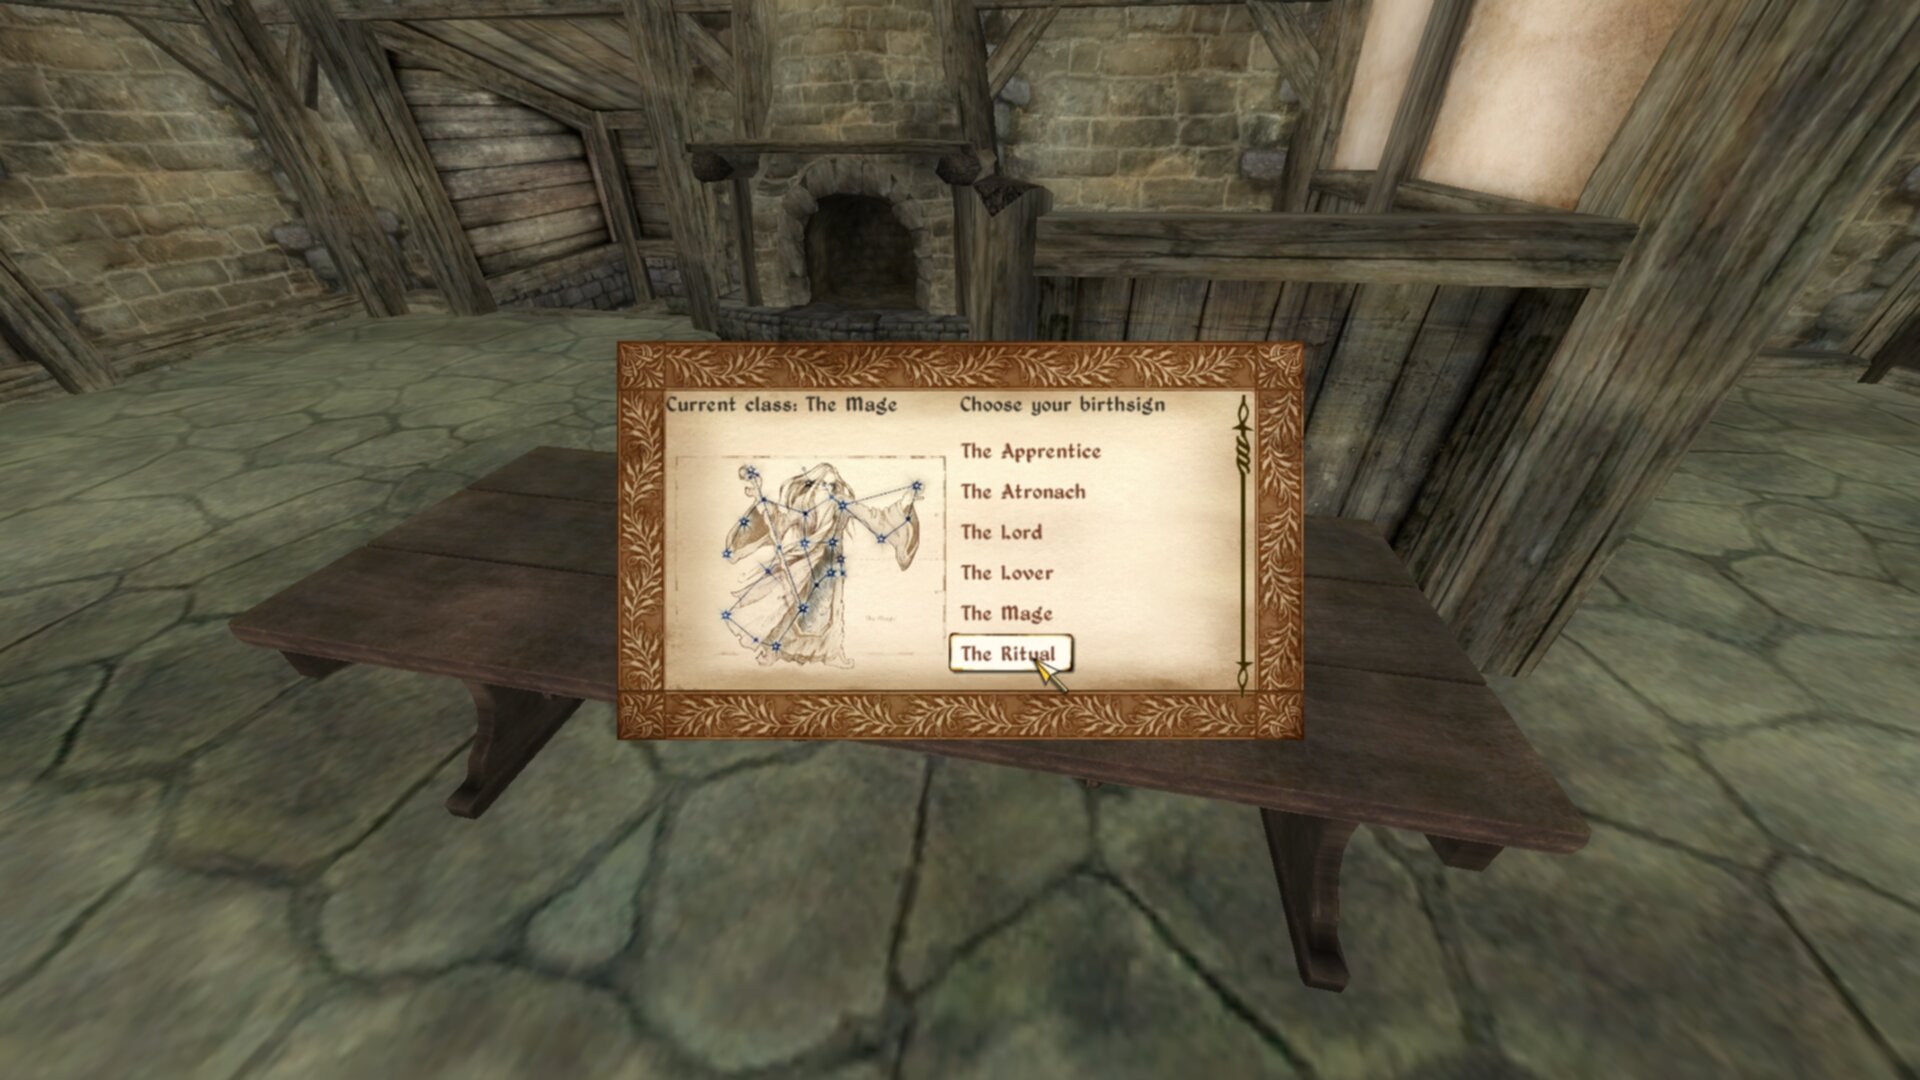
But with this in mind, you should be able to scroll with a mouse wheel and by dragging the scroll
bar marker. Also, as a side effect of everything we’ve previously set up with the XML document we
can also use the arrow keys (or controller) to navigate the list with scrolling.
None of this was painful now was it?
Setting Birthsign
Now that we have scrolling working, let’s make the menu actually do what want it to do: set the player’s birthsign.
This is where things become more complicated from a programmer’s perspective. See, we need to be able to both display the birthsign name and set the player’s birthsign. But there’s a loss of information when we get the name of a object. It is functionally impossible to go from an object’s name to an object’s editorID. So what do we do? For this, we need a deeper understanding of how Oblivion stores objects.
EditorIDs & FormIDs
Objects in Oblivion are literally everything. Every quest, script, item, NPC, etc… is an object. There are two ways to express the unique tokens for each object, the “editorID” and the “formID” (typically referred to as a form).
- EditorID:
An alphanumerical string of characters with no spaces or special characters. There’s no limit past the lack of special characters.
- FormID:
A hexadecimal number, with the first 2 characters being optional. The first 2 characters are the hexadecimal index of the plugin, and thus not static. Thus we have a 6 bit object limit for every plugin.
Despite being able to see both of these pretty much everywhere, from vanilla Construction Set to the
extender to the game itself, you cannot use formIDs easily anywhere. There is exactly one
function that allows you to directly to use forms: GetFormFromMod.
Curiously, there are a number of functions that let you use the decimal form of formIDs but these are not used outside of specific needs.
And even worse, we cannot get the token of editorIDs at all. We cannot store BirthsignWarrior for instance, it would only store the decimal notation of this. This might seem fine, but it can run into issues with float precision along side lack of support of decimal -> editorID support.
How to Store Forms
So, we only have one function that can directly use forms and we can’t store editorIDs really. That leaves us with one real option:
directly storing the hexadecimal form inside the menu itself
This is, frankly, a convoluted approach but the only other option is to somehow store the index of the array to index and then to subscript the array when we need to. I believe this is ultimately the simpler option on the code, even if more abstract.
So, how do we deal with this?
If you read through the XML Reference, you may have come across the idea that
traits that have _ prefixed are custom and can be used for literally anything. As well, if you
read through the 2 prefabs we used in this menu (generic_background.xml and
vertical_scroll.xml) you’ll also see these used. This basically means we can set to do anything
we really want. So, lets create a data tile in our XML document that stores data for each list
item:
<template name="bmr_list_template">
    <rect name="bmr_list_item">

                    <!--...-->

        <rect name="data">
            <_signhex> nil </_signhex>
        </rect>

        <text name="bmr_list_name" >
                    <!--...-->
        </text>

        <rect name="bmr_list_focus">
                    <!--...-->
        </rect>
    </rect>
</template>
This tile is just a rect that contains a single underscored prefix trait: _signhex. There’s
nothing else we need to do with the XML document here.
Scripting Form Storage
We actually have everything we need to store the form. Remember that side-effect function in Scripting the List? We can simply add our storage in there.
scn BMRSetListText
string_var sTile
array_var aList
int iIndex
string_var sText
string_var sTrueTile
ref rTempRef
Begin Function {sTile, aList, iIndex}

        ;; Normalize list index tile name
        Let sTrueTile := sTile + "\" + $iIndex

        ;; Store reference to list item in hex format
        Let rTempRef := aList[iIndex]
        Let sText := GetRawFormIDString rTempRef
        Call GMFSetTileStringValue (sTrueTile + "\" + "data") "_signhex" sText

        ;; Render name of reference
        Let sText := GetName rTempRef
        Call GMFSetTileStringValue sTrueTile "user1" sText
End
This isn’t so bad. We already have the editorIDs from the passed array, and we can use
GetRawFormIDString to get the hexadecimal string form for this reference, and then store it into
our our data rect.
For reference, a hexadecimal string is stored as a string with 0x prepended. We will deal with
this later.
Extracting From Storage
Now that we stored the form, we need to extract it. It’s a bit more complicated, but first we need to actually be able to interact with the menu. Yet again, this is pretty simple. MenuQue offers event handlers, which fires a function based on some game event. GenericMenuFramework wraps this up neatly for us, so its just a couple of lines:
scn BMRFunction
ref rBirthsign
string_var sBirthsign
array_var aBirthsigns
ref rFunction
Begin Function{}
        ;; Add IDs to passing array
        Let BMR.aIDs := ar_Construct array
        ar_Append BMR.aIDs 33                ;vertical_scroll_marker
        ar_Append BMR.aIDs 100               ;bmr_background
        ar_Append BMR.aIDs 120               ;bmr_info_box
        ar_Append BMR.aIDs 122               ;bmr_scroll_bar
        ar_Append BMR.aIDs 123               ;bmr_info_list_box
        ar_Append BMR.aIDs 200               ;bmr_list_item

        ;; Set up birthsign information
        Let rBirthsign := GetPlayerBirthsign
        Let sBirthsign := GetName rBirthsign
        let aBirthsigns := ar_Construct array
        ar_Append aBirthsigns BirthSignApprentice
        ar_Append aBirthsigns BirthSignAtronach
        ar_Append aBirthsigns BirthSignLord
        ar_Append aBirthsigns BirthSignLover
        ar_Append aBirthsigns BirthSignMage
        ar_Append aBirthsigns BirthSignRitual
        ar_Append aBirthsigns BirthSignSerpent
        ar_Append aBirthsigns BirthSignShadow
        ar_Append aBirthsigns BirthSignSteed
        ar_Append aBirthsigns BirthSignThief
        ar_Append aBirthsigns BirthSignTower
        ar_Append aBirthsigns BirthSignWarrior

        ;; Create menu using GMF
        Call GMFShowMenu "kat\birthsignremake.xml" 400
        Call GMFSetTileStringValue "bmr_background\bmr_class_name" "string" ("Current class: " + sBirthsign)
        Call GMFSetTileStringValue "bmr_background\bmr_background_image" "filename" ("Menus\Birthsign\Birthsign_" + sBirthsign + ".dds")

        ;; Populate List
        Let rFunction := BMRSetListText
        Call GMFInsertArrayList "bmr_background\bmr_info_box\bmr_info_list_box" "bmr_list_template" aBirthsigns rFunction
        Let rFunction := BMRHandlerFunction
        Call GMFSetOnClickByIDHandler rFunction 200

        ;; WARN: Remember to destruct strings
        sv_Destruct sBirthsign
End
Since we want to interact with only a specific ID, we need to use GMFSetOnClickByIdHandler,
using 200 for the ID since that’s what we set the list item’s IDs to. For any click (or enter key),
this function will be called. For the function that’s called:
scn BMRHandlerFunction
int iMenuType
string_var sTile
int iID
string_var hBirthsign
ref rBirthsign
string_var sBirthsign
Begin Function {iMenuType, sTile, iID}

        ;; Grab stored hex, trim, get form from hex value, and return reference
        Let hBirthsign := Call GMFGetTileStringValue (sTile + "\data\") "_signhex"
        Let hBirthsign := hBirthsign[2:-1]
        Let rBirthsign := GetFormFromMod "Oblivion.esm" $hBirthsign

        ;; Set current player class, class image, and class name
        SetPlayerBirthSign rBirthsign
        Let sBirthsign := GetName rBirthsign
        Call GMFSetTileStringValue "bmr_background\bmr_class_name" "string" ("Current class: " + sBirthsign)
        Call GMFSetTileStringValue "bmr_background\bmr_background_image" "filename" ("Menus\Birthsign\Birthsign_" + sBirthsign + ".dds")
End
First we grab the hexadecimal string we stored. Remember how this is a hexadecimal string? Well we
can simply trim out the first 2 characters with a substring. If you’ve never seen substringing that
has slicing it can seem confusing, but essentially we are accessing characters from:to. In this
case starting from the index 2 (inclusive) to -1 (representing to the end).
GetFormFromMod requires the plugin name and a hexadecimal form as a string, which gets returned
as a normal EditorID. And then, since we have a reference we can do everything else we need!
Set the player’s birthsign
Set current class name
Set current class image
That was a lot of work, but now you have a functioning menu.
Finishing Up
We have a functioning menu, but we aren’t actually done just yet. You may have tried to close the menu, only to realize that we can’t. But this is a bit simple to add, so lets do it.
<text name="bmr_class_name">
<!--...-->
</text>

<image name="bmr_class_return_button">
        <include src="button_long.xml" />
        <depth> 3 </depth>
        <id> 112 </id>
        <x> 50 </x>
        <y> 25 </y>
        <clicksound> 2 </clicksound>
        <user0> <copy src="strings()" trait="_return"/> </user0>
        <user2> 3 </user2>
</image>

<rect name="bmr_info_box" >
<!--...-->
</rect>
Thankfully there’s not much, since this is a readily used feature by all vanilla menus. We do use
inserted _return value instead of hardcoding it. This is useful for localization.
How does this work though? The function GMFShowMenu accepts a “close ID”, where if this ID is
clicked the menu will close. If 0 is passed, any ID will close the menu. So in this case, we just
need to change the value we were using in BMRFunction:
scn BMRFunction
;;-------------------
        ;; Create menu using GMF
        Call GMFShowMenu "kat\birthsignremake.xml" 112
;;-------------------
End

Note that since I’m using DarnifiedUI that the return button font is unaligned. This is a byproduct of mixing UI prefabs. Vanilla only UI prefabs were used here for reproducability.
Congrats you made a functioning menu. Many parts, but no complicated parts. And everything is pretty easy to expand out.